October 30, 2006

Sanding Plastic


One of the biggest issues you must confront when sanding plastic is heat...sanding friction causes heat, and plastic parts absorb the heat. Metal parts also warm up from the sanding friction, but metal tends to reflect the heat back out again. Because plastic parts absorb heat, they can soften or even re-flow under power sanding.

Sanding plastic is a good thing--it effectively doubles the surface area, providing twice the opportunity for a new coating to adhere to the surface. Even a light scuff-sanding will help with adhesion...there are just more places for the new coating to cling to.

On the other hand, too much sanding can cause problems--like the "hairing" that you'll see when some plastics split and melt into hair-like strands. Too much power sanding can also cause thermoplastics to reflow. After a forceful sanding, the scratches are very evident. But walk away and when you return just minutes later, the scratches have disappeared--the heat melts them flat again.

The moral of the story is: always be careful on plastic parts. Turn the air pressure way down or even sand by hand to avoid heat buildup!

For more information on sanding plastics, check out our website at www.abrasiveresource.com

September 28, 2006

Polished Finishes on Stainless Steel


The most popular finish in stainless steel fabrication is the No 4 finish--the easiest to maintain and one with a nice surface appearance. A No 4 surface is produced by cutting the surface with coated abrasive belts to remove a very small amount of metal without affecting its thickness. Because it is directional, it allows for easy matching of surfaces. The "official" definition of a No 4 finish is "a linearly textured finish that is produced with mechanical polishing. The average surface roughness (Ra) may generally be up to 25 micro-inches (0.64 micrometeres)."

The Specialty Steel Industry of North America has set guidelines for polished finishes on stainless:

No 3: An intermediate polished surface obtained by finishing with a 100 grit abrasive. Generally used where a semi finished polished surface is required. A No 3 usually receives additional polishing during fabrication.

No 4: A polished surface obtained by finishing with a 120-150 grit abrasive, following initial grinding with coarser abrasives. This is a general purpose bright finish with a visible "grain" which prevents mirror reflection.


With the introduction in recent years of non-woven abrasives, many fabricators are also using a medium non-woven belt to achieve the No 4 finish. If you have other questions regarding finishing stainless, please feel free to call Abrasive Resource at 800-814-7358, or visit us online at: www.abrasiveresource.com

September 14, 2006

Sanding Backing Pad


A quality disc sander back-up pad should have:

1. A specially designed, environmentally friendly, molded polyurethane foam, that dampens vibration to prevent your tool from bouncing, yet is flexible and tough enough to withstand the rigorous operation of dual-action random orbit sanders. A permanent bond between the polyurethane and other components of the pad eliminates separation problems.

2. A rugged thermoset fiberglass epoxy backing, that withstands the abuse of heat, flexing and impact, to keep the pad running flat and true for a long time. Aluminum backings bend from impact and lose their flatness, while heat and flexing cause molded plastic backings to warp, distorting the face of the pad. A pad that is not flat causes vibration--which fatigues the user and compromises your finish.

3. Full 1/2" diameter vacuum holes that match the industry standard in sanding discs and allow maximum performance of your tool's vacuum system.

4. A durable welded and plated stud assembly. Welding assures a permanent alignment between the pad and the tool. Plating assures easy pad removal by preventing corrosion.

5. A stud assembly that is rigidly attached to the backing with four rivets. Stud assemblies that are molded in place can loosen and strip causing poor performance and difficulties when removing the pad from the tool. A large, flat, raised steel washer with a four rivet attachment forms an ideal distributor of stress. This assures perfect alignment with all tools, and allows the pad to remain in service for a long time.

6. An embossed vinyl facing or hook facing that is intimately molded with the polyurethane to create a permanent durable and flat surface. Embossed vinyl facings offer maximum adhesion with PSA style paper while operating the tool, yet allow quick and easy replacement. Quality hook facings also offer secure adhesion yet quick and easy removal.

7. Strict tolerance on weight, balance, roundness, and flatness. A pad that is not the correct weight, out of round, out of balance, or not flat causes vibrations which fatigue the user and prevent creating a professional finish. Strict tolerances assure you that each pad performs consistently for a long time.

Abrasive Resource carries back-up pads in stock for same day shipping in both the embossed vinyl facing for PSA or the hook facing for hook-n-loop discs. Check out our website at: www.abrasiveresource.com

August 29, 2006

The History of Abrasives

Think of a product. Any product. Somewhere in the making of that product an abrasive application takes place. The use of abrasives goes back almost since the beginning of recorded history. Prehistoric men, for example, sharpened their tools and weapons by rubbing them together.

Stone used in building the Pyramids of Egypt were smoothed with a naturally "bonded" abrasive--sandstone! Around 2100 B.C. a creative Egyptian engineer mounted a circular wheel on a crude sort of lathe and ground bronze tools and ornaments, launching the art of cylindrical grinding. During the Middle Ages, armor and swords were ground and polished. The first recorded manufacture of coated abrasives goes back to the 13th century when the Chinese used natural gums to bind crushed seashells to parchment.

At the turn of the century, coated abrasives took a giant step forward with the development of the new electric furnace grains, silicon carbide and aluminum oxide. Over the years, sanding became even more popular as a number of new products emerged on the scene and on the production line. Sanding had an impact on all these products--wood and metal as well as glass. Henry Ford, for example, did more for the metal grinding industry than anyone in history.

Ford realized that an ounce of extra weight in any part acted and reacted upon every part. His demand for light parts of great strength created the first big tonnage of alloy steels, whose sensitivity to heat treatment not only fulfilled his requirement of strength without weight but called for grinding to finish instead of cutting with metal tools.

Through the Industrial Revolution, the post-World War II economic boom and a surging economy in the 1990's, abrasives have always been a part of the production process, and they will continue to do so in this millennium.

Information for this article was taken from Chapter 1 "The History of Abrasives" in the Abrasives Product Training Manual published by the Industrial Distribution Association awhile back. The IDA has now merged with the Industrial Supply Association. To learn more about this resource for distributors, visit www.isapartners.org. For more information on abrasives and sandpaper, please check out our website at:
www.abrasiveresource.com

July 19, 2006

Metal Finishing

There is an excellent article in the archives at the website for the e-magazine "The Fabricator". It's called "Choosing the right coated abrasive for plate finishing applications". I'll tease you with a little bit here, but make sure you check out the full article at
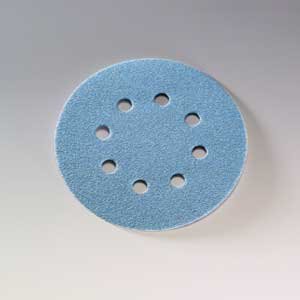
 www.thefabricator.com

Ceramic aluminum, a sharp microcrystalline grain, cuts aggressively under light to moderate pressures. Its quick cutting capability makes it suitable for grinding stainless steel, titanium, and high-nickel alloys. It works well on applications in which high rates of stock removal are required under light pressures, such as when plates require rounding or dimensioning. Ceramic aluminum’s microcrystalline structure gives it a very long life. It is temperature-sensitive, meaning that removing heat from the cut extends the life of the grain. Quite often ceramic products require grinding aids to reduce heat.

Zirconia alumina, although less expensive than ceramic aluminum, also is a single crystal that is very tough and sharp. In fact, this grain is so tough that it withstands heat very well. However, a common problem with zirconia grain is glazing, which occurs when the grains dull from insufficient grinding forces. Rubbing the dulled grains causes the metal to adhere to the tips of the grain. Reducing glazing requires heavier grinding forces to fracture the grain and enable resharpening. Therefore, zirconia lends itself to the higher temperatures and heavier pressures that are present in high-stock-removal applications.

Zirconia’s advantage over ceramic primarily is its performance in high-heat and heavy-pressure applications, such as those characterized by mechanically applied pressures that generate a large spark array. The heavy grinding pressures effectively resharpen the grain, promoting long wear life without adverse effects from the high temperatures. Plate examples are power-pack grinding of castings and automated grinding of fixtured tools.

Aluminum oxide is a single-crystal grain used in most polishing applications because of its durability and longer service life than silicon carbide’s. This grain is less tenacious than ziconia and therefore requires less pressure to prevent glazing. Soft metals, such as aluminum and some carbon and stainless steels, usually are good candidates for aluminum oxide grain products. For the most part, these metals are not as sensitive to the heat that is sometimes generated by the aluminum oxide grain because of its crystalline structure.

Silicon carbide, also a single-crystal grain, is the sharpest and hardest of all grains, but it is also the most brittle of all, resulting sometimes in a short service life. This grain’s advantage is its ability to work well on very hard, tenacious metals such as titanium, cobalt, and INCONEL® alloys. Silicon carbide’s sharp shape and extremely hard properties make it the most suitable grain to work on these metals. Conversely, the “blocky” nature of aluminum oxide grain renders it incapable of penetrating these surfaces efficiently, causing higher heat generation and resulting in a shorter service life.

In addition, because of silicon carbide’s sharp, slender shape, it produces a brighter finish profile on stainless steel and some carbon steels.

You can subscribe to The Fabricator by going to: www.thefabricator.com
For more information on sanding and sanding products, check out our website
www.abrasiveresource.com

Sanding Wood

I thought we had one of the only blogs that extolled the virtues of sandpaper. Well, while doing an Internet search I ran across another blog where the writer sings the praises of sanding! It's called "Stay of Execution" and this entry is from awhile back, but let me share a little bit of it with you...

I don't do it much, but there's something that I've always loved about sanding wood. I like the repetitive back and forth, feeling the slight scrape beneath my fingers. I like seeing the soft tracks that the sandpaper leaves in the wood, a dusty faded trail. I like touching the wood and feeling its texture, the rough spots that you haven't gotten to and the smooth powdery feel where you have already been. The wood dust on your fingers and even the way it tickles your nose a bit...

Isn't Sherry a good writer? She has captured the emotions behind sanding wood--a tactile, artistic sense of accomplishment! To see the whole entry, visit her blog at:
Stay of Execution
For more information on sanding and sanding products, check out our website
www.abrasiveresource.com

June 22, 2006

Woodworking Dust Masks


Never say "no" to a dust mask. Among woodworkers, the chances of developing nasal and sinus cancer run up to 40 times greater than non-woodworkers. Although researchers haven't identified the exact cancer-causing compound, some evidence points to the dust generated from sanding wood with a high tannin content, such as chestnut, redwood, western red cedar, hemlock and oak!
Always use the dust collection option on your sanders and work in a well ventilated area. The inhalation of fine wood dust from sanding can have many effects on the respiratory tract, including: a runny nose, violent sneezing, stuffed up nose, nose bleeds and even nasal cancer. Asthma is another concern...most wood dusts can irritate the respiratory tract provoking asthma attacks in those individuals that develop allergies to wood dust.

For information on Wood Toxicity, check out the following links:
1. www.woodturner.org and look under "Resources"
2. Greater Vancouver Woodturners Guild Wood/Dust Toxicity Article

If you are interested in purchasing a new dust mask or respirator--do your research. Face masks depend on good contact between the skin and the mask for their effectiveness, and you want to find a style that is comfortable to work in! A few of our customers have recommended the masks made by www.aosafety.com

For more information on sanding and sanding products, check out our website
www.abrasiveresource.com

June 20, 2006

Paint Your Car At Home


Did you see the April, 2006 issue of Car Craft Magazine? The cover story is "Paint your Car at Home", and it's all about how expensive it is these days to do paint and bodywork on a car. The author, Jeff Smith, writes:
"Today, the cost of materials can easily run $2000 and up if you want to use top-notch materials and do the job right. Labor cost? Expect to pay $60 per hour minimum. So, this leaves the budget-beleagured car crafter with one alternative--do it yourself. You've probably heard all this before, but it demands repeating. The key to a quality paint job is all in the prep work before any color ever finds its way onto the car."

The article goes on for 6 more pages, detailing every aspect of painting your car at home, with lots of good, detailed photographs. Best of all, what a pleasant surprise to find Abrasive Resource listed at the end of the article as one of their material suppliers! Since they gave our website a "shout out", we will do the same...

If you are interested in purchasing a back issue of Car Craft Magazine, simply go to www.carcraft.com and click on the link for "Back Issues". Click on Car Craft in the left navigational bar and then scroll down the page until you find April, 2006!

The sanding discs used for refinishing the '65 El Camino in this article can be found at www.abrasiveresource.com

June 16, 2006

Abrasive Belt Burning


The Wood Machinery Manufacturers of America have a new e-mail newsletter called "Productivity Tips". It is going to be a series of six e-newsletters dedicated to helping professional woodworkers improve productivity, quality, safety and ultimately, the bottom-line of their businesses. It is presented in a Q & A format and the answers are supplied by resident experts of WMMA companies.

Here's a question that particularly caught our attention:


Q. My abrasive belt is loading up and burning quickly, what am I doing wrong?
A. You're either trying to remove too much stock for the grit of belt you are using, or you are running the feed too fast. Basically, there are three types of belts, including: abrasive planning (grits from 24 through 60), light calibrating belts (grits from 80 through 120) and finishing belts (grits from 150 through 220 or more). Each grit type is designed to remove a specific amount of stock at a certain feed rate.

For instance, a 100-grit belt can remove 0.025 inch on oak at 20 feet per minute. If you push beyond these parameters, the belt will load up and burn your product. A rough guideline is to use abrasive planning belts if your stock removal is 0.060 inch or more, calibrating belts for stock removal from 0.012 inch to 0.050 inch and finishing belts for no more than 0.005 inch stock removal (at around 20 feet per minute).


The expert in this case was Tim Mueller, Marketing Director at Timesavers, Inc.

If you would like more information on the Wood Machinery Manufacturers of America, their website is at www.wmma.org

If you are interested in obtaining high quality sanding belts for woodworking, visit our website at www.abrasiveresource.com

May 23, 2006

Flap Disc


A Flap Disc is the ideal tool for stock removal, grinding and blending of welds, castings and other metal finishing applications! They are available in 4", 4-1/2" and 7" diameters to fit on an angle grinder and grits 40, 60 and 80 are by far the most popular. Abrasive Resource stocks these heavy duty overlap discs in a premium closed coat blue Alumina Zirconia grain designed for metalworking.The backing is made from either a non-flexible, consumable fiberglass in a conical, T-29 shape or a semi-flexible plastic backing on the flat, T-27 shape.

There is a great time savings to be realized from using flap discs compared to the old two-step method of first using a grinding wheel for rough work, then changing to a finer sanding disc for finishing and polishing. A flap disc goes from rough grinding to fine finishing in one operation with a significant reduction in downtime.

For more information on flap discs, or if you would like to try a box out in your shop, visit Abrasive Resource's Online Store at: www.abrasiveresource.com

April 28, 2006

Solid Surface Polishing


When it's time for the Solid Surface Fabricator to polish up the workpiece, he needs to choose between a matte, semi-gloss or high-gloss finish. Whether they are working on a huge retail store or a small bathroom vanity, the process is the same.

The blue aluminum oxide products designed for solid surface sanding from sia Abrasives are available through Abrasive Resource in discs, strips, rolls, sheets and belts of all sizes and configurations. By using this "systems approach" with the same blue line abrasives from beginning to end you maintain a consistent, high-quality finish.

Matte: 120 grit, 180 grit, 280 grit and a maroon siascuff disc
Semi-Gloss: 120 grit, 180 grit, 280 grit, 400 grit and a grey siascuff disc
High-Gloss: 120, grit, 180 grit, 280 grit, 400 grit, 600 grit, 1000 grit and a gold siascuff disc

Why choose sia Abrasives for all your solid surface finishing needs? With more than 125 years of abrasive technology, sia Abrasives is the world's third largest manufacturer of coated abrasives and was recently named an "Approved Vendor" by Dupont on Corian products.

For more information, contact Abrasive Resource at 800-814-7358 or visit their website at: www.abrasiveresource.com

April 19, 2006

Sharpening Scissors

Here's an idea from our "alternative uses for sandpaper" file. To sharpen scissors, simply cut through a piece of fine grit sandpaper! Its gritty surface is SOS for dull scissors and restores the blade to like-new quality so you can snip with ease. For more information on sandpaper and abrasives, check out the Abrasive Resource website: www.abrasiveresource.com

March 31, 2006

Swirl Marks


Swirl marks are, unfortunately, inevitable when you sand with a disc sander. The good news is that there are some tips and techniques to make them less noticeable.
1. Use a disc sander with a vacuum attachment. You want to eliminate as much of the stray grit and dust created as possible while you are actually sanding.

2. Use graduated sandpaper grits. For the best finish you should not skip intervals (even though that is a common practice!) Swirl marks left by a 120 grit disc, for example, won't be as easy to remove with a 180 grit paper as with a 150 grit.

3. In between each grit change, blow off your workpiece with an air gun to clean any stray grit off your work.

4. Don't press down on your sander! Let the weight of the sander do the work--simply guide the sander.

5. Finally, your last step is to hand sand with the same grit you last used on your disc sander. Always use some sort of a block for even pressure and lightly sand in the same direction across your work piece.

Before finishing, set your work light at a low angle across the sanded surface. Wipe with denatured alcohol and any remaining swirl marks will be revealed...
Questions? Comments? Feel free to contact us at:
www.abrasiveresource.com

March 30, 2006

Wet or Dry Sandpaper

Here at Abrasive Resource, we sell sleeve after sleeve of waterproof silicon carbide paper. It's used in almost all of our markets--automotive & marine, cultured marble, woodworking, metalworking, stone, glass, plastic and even rubber!

The history behind this versatile abrasive is an interesting one. A man named Francis Okie, a printing ink manufacturer in Philadelphia, had an idea for a new type of waterproof sandpaper. Okie's idea was for a revolutionary new sandpaper that could be used with water or oil. Wet abrading would reduce the dust hazards created from some of the dry sanding applications and also create a smoother finish.

Francis was so confident of the cutting power of his wet or dry sandpaper, he supposedly kept a piece of it in his club locker and shaved with it before golfing!

In 1921 the 3M Company purchased the rights to waterproof sandpaper from Mr. Okie for $1.00.

Are you using the black SC waterproof paper in your shop? We carry several different brands and would be happy to help you determine which would be best for your application...

Contact Abrasive Resource at: 800-814-7358 or check out our website at: www.abrasiveresource.com

March 29, 2006

How To Sand Moulding

Of course, large production shops have expensive machinery that will sand moulding. For the smaller woodworker, however, there is an easy and basic technique for sanding by hand.

Take a piece of the molding and glue some 80 grit sandpaper to it. Then take some foam insulation board and rub it over the profile, allowing the sandpaper to shape the foam board, creating a reverse pattern.

Once complete, glue a piece of sandpaper (now in the proper grit for finishing) to your new foam board sanding block!

For information on sandpaper sheets that you could use, check out our website at: www.abrasiveresource.com

March 03, 2006

Sandpaper Ballet


Sandpaper is not just for smoothing...it's also used in making music!

Are you familiar with the American composer Leroy Anderson? He was best known for his short, light concert music pieces that are still played at pop concerts around the world. He's probably most well known for the songs "The Syncopated Clock" which was the theme music on The Late Show years ago and "The Typewriter" which included the sounds of a real typewriter in the music.

My favorite however, is of course, The Sandpaper Ballet. Written in 1954, Anderson tries to imitate the sound of soft-shoe dancers as they hoof-it across the old wooden stage that's been sprinkled with sand. The story goes that he rubbed 3 different grits of sandpaper on a block of wood during the piece to get the desired percussive sounds.

Go to Amazon.com and listen to a sound clip. Sandpaper Ballet is #17 on the list. It'll make you smile and maybe even buy the whole CD to listen to!
Leroy Anderson Favorites
If listening inspires you to buy your own sandpaper, visit our website at www.abrasiveresource.com

February 27, 2006

Planing Wood

Believe it or not, sometimes sanding works better than planing wood. Straight, clear grain is easy to plane. You can take a deep cut at a high feed rate and produce a fairly smooth surface. Figured wood, however, doesn't have a consistent grain direction--it presents both end grain and long grain on its surface. Because of this, it is difficult to plane. The planer knives tend to lift the end grain and tear it out, leaving the surface chipped and gouged. When this is the case, plane the stock until it is slightly thicker than needed and then sand to its final thickness!

Sanding to thickness takes longer than planing, but it's gentler on the wood. The abrasive does not lift the grain like planer knives and consequently there is no chipping or tear out. This allows you to surface thin and highly figured wood as well as rough, resawed and glued-up stock. Use only a coarse abrasive for thicknessing--no finer than a 50 grit and a stationary sander that allows you to adjust the height of either the table or head in small increments. A wide belt sander or drum sander such as the Performax are the most popular choices to use as a thickness sander.

Don't try to remove too much stock at once; the machine will bog down and the abrasive will clog. Remove a maximum of 1/32 inch at a time from softwood and narrow hardwood boards--1/64 inch from wide hardwood boards. When surfacing rough or uneven stock, carefully adjust the machine to remove the high spots first.

Always use a cloth backed abrasive with a resin bond. In recent years, the tough, blue zirconia abrasive material (that was originally engineered for metal grinding) has become popular for abrasive planing. Otherwise, the tried-and-true material is always Aluminum Oxide. In addition, a cloth backing that contains polyester will help provide strength in this more aggresive application and the resin bonding system in the abrasive can withstand the higher heat levels that will develop with this operation.

For smoothing, you can use finer grades--step up your grits slowly until you reach 100 grit! For more information, visit our website at www.abrasiveresource.com

February 16, 2006

Abrasives Manufacturer Tips for Proper Abrasive Storage

It's true. Failure to store abrasive products under the correct conditions can lead to breakage or warping, which leaves your coated abrasive disc or belt in a weakened or ineffective state. Here are some tips from a few of the major abrasives manufacturers:

1. Store all coated abrasives in areas that maintain a 40-50% relative humidity and at 60-80 degrees F. Humidity issues can cause cupping of coated abrasive products. In addition, if a sanding belt is in too high of humidity you can experience tracking or creasing issues and if stored in too low of humidity, the tape joint can dry out over time and break.

2. Abrasives should be kept in their original packaging for storage and cartons should be kept at least 4" away from damp or cold walls and floor where they might absorb moisture.

3. Abrasive storage should also be in a place that is out of direct sunlight, away from open windows and doors as well as radiators, steam pipes, furnaces and exhaust vents.

4. Precondition abrasive belts prior to use by removing from the carton and allowing to adjust to the ambient air. They should be rolled up and stored on their edge on a clean shelf or draped over a large cylinder, such as a gallon can or a flanged hanger of the type used for garden hose. NEVER hang a belt from a peg or nail--the back will crease and the abrasive may crack. This is especially important for wide belts, which should be removed up to 24 hours prior to use.

5. Rotate your stock--first in and first out!

Of course, always follow any abrasive manufacturers storage instructions included with the product. Questions? Feel free to visit us at www.abrasiveresource.com for more information...

February 15, 2006

Finishing Drywall


The "fuzz" that is associated with sanding drywall is a constant battle between the sanding guys and the painters...who should take care of that fuzz? Our Online store at www.abrasiveresource.com sells 9" discs in both PSA and hook-n-loop that can be used on the power sanders most often used in finishing drywall. The sanders typically use an 80, 100, 120 or 150 grit (depending on the tape job!) and the painters are using a 220 to sand after the prime coat is applied.
Here are some ideas to eliminate the fuzz, suggested by the very people who are dealing with it on a day to day basis. If you have other ideas, please e-mail us here at: mail@abrasiveresource.com,
Finishing Dry Wall
1. Try to keep the sandpaper off the drywall paper and you won't have the fuzz!
2. Take a soft bristle floor broom to the surfaces after the final sanding and prior to the first coat of paint, which removes the particles from the "fuzzed" paper face. This will allow the paint to lay the damaged paper down and flow across the surface more efficiently.
3. Another way to clean the surface and lay the damaged paper down is to wipe the sanded areas with a damp sponge before painting.
4. Use a quality primer.
5. Prime coat should be rolled or sprayed and back-rolled. This lays down the sanding lines and adds a small amount of stipple for good coverage.
6. Check the directions on the paint can. Most are clearly marked "sand between coats".

January 25, 2006

Sanding Automotive Body Filler

One of the automotive websites that links over to the Abrasive Resource website www.abrasiveresource.com has "How-To" information and we were interested to see that they include some articles on automotive finishing! Here are some excerpts from their article "Using Body Filler":

First, the bodyman finishes the filler work to 80 grit, then a quick trip over the filler and old paint edge with 180 grit on a DA sander (lightly to not destroy the shaping), then feather edge the surrounding repair with 320 grit on a DA sander. Scuff a little past the area to be primed with a 6 x 9 maroon scuff pad. Prime the area and after it has cured any areas that need slight block sanding can be done with a 320 grit on the primer.

Basic Guidelines for Automotive Sanding:
24-36 grit for paint removal, bare metal Bondo prep and roughing out the filler with an air file or hand board.

60-80 grit for smoothing out the rough scratches from the previous operation and shaping fine contours.

80-180 grit for further smoothing in preparation for high-build catalyzed primers (with hardner) or 240-320 grit for lacquer-based (non-catalyzed) primers.

220-600 grit for final sanding prep before paint, following the manufacturers guidelines on their product information sheet.

600-2000 grit for sanding clear coats or for removing minor surface imperfections prior to polishing and buffing.

For more information, check out www.Roadsters.com. A guy named Dave created Roadsters.com back in the summer of 1996, and continues to update it every day. The site is used by thousands of automotive professionals and hobbyists to quickly access organized links to around 8,000 quality automotive and motorcycle Web sites.

Basic Sanders

The basic styles of portable sanders haven’t changed very much over the years. We have some old advertising posters from the Rockwell Manuf...