March 31, 2006

Swirl Marks


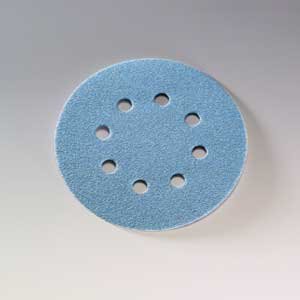
Swirl marks are, unfortunately, inevitable when you sand with a disc sander. The good news is that there are some tips and techniques to make them less noticeable.
1. Use a disc sander with a vacuum attachment. You want to eliminate as much of the stray grit and dust created as possible while you are actually sanding.

2. Use graduated sandpaper grits. For the best finish you should not skip intervals (even though that is a common practice!) Swirl marks left by a 120 grit disc, for example, won't be as easy to remove with a 180 grit paper as with a 150 grit.

3. In between each grit change, blow off your workpiece with an air gun to clean any stray grit off your work.

4. Don't press down on your sander! Let the weight of the sander do the work--simply guide the sander.

5. Finally, your last step is to hand sand with the same grit you last used on your disc sander. Always use some sort of a block for even pressure and lightly sand in the same direction across your work piece.

Before finishing, set your work light at a low angle across the sanded surface. Wipe with denatured alcohol and any remaining swirl marks will be revealed...
Questions? Comments? Feel free to contact us at:
www.abrasiveresource.com

March 30, 2006

Wet or Dry Sandpaper

Here at Abrasive Resource, we sell sleeve after sleeve of waterproof silicon carbide paper. It's used in almost all of our markets--automotive & marine, cultured marble, woodworking, metalworking, stone, glass, plastic and even rubber!

The history behind this versatile abrasive is an interesting one. A man named Francis Okie, a printing ink manufacturer in Philadelphia, had an idea for a new type of waterproof sandpaper. Okie's idea was for a revolutionary new sandpaper that could be used with water or oil. Wet abrading would reduce the dust hazards created from some of the dry sanding applications and also create a smoother finish.

Francis was so confident of the cutting power of his wet or dry sandpaper, he supposedly kept a piece of it in his club locker and shaved with it before golfing!

In 1921 the 3M Company purchased the rights to waterproof sandpaper from Mr. Okie for $1.00.

Are you using the black SC waterproof paper in your shop? We carry several different brands and would be happy to help you determine which would be best for your application...

Contact Abrasive Resource at: 800-814-7358 or check out our website at: www.abrasiveresource.com

March 29, 2006

How To Sand Moulding

Of course, large production shops have expensive machinery that will sand moulding. For the smaller woodworker, however, there is an easy and basic technique for sanding by hand.

Take a piece of the molding and glue some 80 grit sandpaper to it. Then take some foam insulation board and rub it over the profile, allowing the sandpaper to shape the foam board, creating a reverse pattern.

Once complete, glue a piece of sandpaper (now in the proper grit for finishing) to your new foam board sanding block!

For information on sandpaper sheets that you could use, check out our website at: www.abrasiveresource.com

March 03, 2006

Sandpaper Ballet


Sandpaper is not just for smoothing...it's also used in making music!

Are you familiar with the American composer Leroy Anderson? He was best known for his short, light concert music pieces that are still played at pop concerts around the world. He's probably most well known for the songs "The Syncopated Clock" which was the theme music on The Late Show years ago and "The Typewriter" which included the sounds of a real typewriter in the music.

My favorite however, is of course, The Sandpaper Ballet. Written in 1954, Anderson tries to imitate the sound of soft-shoe dancers as they hoof-it across the old wooden stage that's been sprinkled with sand. The story goes that he rubbed 3 different grits of sandpaper on a block of wood during the piece to get the desired percussive sounds.

Go to Amazon.com and listen to a sound clip. Sandpaper Ballet is #17 on the list. It'll make you smile and maybe even buy the whole CD to listen to!
Leroy Anderson Favorites
If listening inspires you to buy your own sandpaper, visit our website at www.abrasiveresource.com

February 27, 2006

Planing Wood

Believe it or not, sometimes sanding works better than planing wood. Straight, clear grain is easy to plane. You can take a deep cut at a high feed rate and produce a fairly smooth surface. Figured wood, however, doesn't have a consistent grain direction--it presents both end grain and long grain on its surface. Because of this, it is difficult to plane. The planer knives tend to lift the end grain and tear it out, leaving the surface chipped and gouged. When this is the case, plane the stock until it is slightly thicker than needed and then sand to its final thickness!

Sanding to thickness takes longer than planing, but it's gentler on the wood. The abrasive does not lift the grain like planer knives and consequently there is no chipping or tear out. This allows you to surface thin and highly figured wood as well as rough, resawed and glued-up stock. Use only a coarse abrasive for thicknessing--no finer than a 50 grit and a stationary sander that allows you to adjust the height of either the table or head in small increments. A wide belt sander or drum sander such as the Performax are the most popular choices to use as a thickness sander.

Don't try to remove too much stock at once; the machine will bog down and the abrasive will clog. Remove a maximum of 1/32 inch at a time from softwood and narrow hardwood boards--1/64 inch from wide hardwood boards. When surfacing rough or uneven stock, carefully adjust the machine to remove the high spots first.

Always use a cloth backed abrasive with a resin bond. In recent years, the tough, blue zirconia abrasive material (that was originally engineered for metal grinding) has become popular for abrasive planing. Otherwise, the tried-and-true material is always Aluminum Oxide. In addition, a cloth backing that contains polyester will help provide strength in this more aggresive application and the resin bonding system in the abrasive can withstand the higher heat levels that will develop with this operation.

For smoothing, you can use finer grades--step up your grits slowly until you reach 100 grit! For more information, visit our website at www.abrasiveresource.com

February 16, 2006

Abrasives Manufacturer Tips for Proper Abrasive Storage

It's true. Failure to store abrasive products under the correct conditions can lead to breakage or warping, which leaves your coated abrasive disc or belt in a weakened or ineffective state. Here are some tips from a few of the major abrasives manufacturers:

1. Store all coated abrasives in areas that maintain a 40-50% relative humidity and at 60-80 degrees F. Humidity issues can cause cupping of coated abrasive products. In addition, if a sanding belt is in too high of humidity you can experience tracking or creasing issues and if stored in too low of humidity, the tape joint can dry out over time and break.

2. Abrasives should be kept in their original packaging for storage and cartons should be kept at least 4" away from damp or cold walls and floor where they might absorb moisture.

3. Abrasive storage should also be in a place that is out of direct sunlight, away from open windows and doors as well as radiators, steam pipes, furnaces and exhaust vents.

4. Precondition abrasive belts prior to use by removing from the carton and allowing to adjust to the ambient air. They should be rolled up and stored on their edge on a clean shelf or draped over a large cylinder, such as a gallon can or a flanged hanger of the type used for garden hose. NEVER hang a belt from a peg or nail--the back will crease and the abrasive may crack. This is especially important for wide belts, which should be removed up to 24 hours prior to use.

5. Rotate your stock--first in and first out!

Of course, always follow any abrasive manufacturers storage instructions included with the product. Questions? Feel free to visit us at www.abrasiveresource.com for more information...

February 15, 2006

Finishing Drywall


The "fuzz" that is associated with sanding drywall is a constant battle between the sanding guys and the painters...who should take care of that fuzz? Our Online store at www.abrasiveresource.com sells 9" discs in both PSA and hook-n-loop that can be used on the power sanders most often used in finishing drywall. The sanders typically use an 80, 100, 120 or 150 grit (depending on the tape job!) and the painters are using a 220 to sand after the prime coat is applied.
Here are some ideas to eliminate the fuzz, suggested by the very people who are dealing with it on a day to day basis. If you have other ideas, please e-mail us here at: mail@abrasiveresource.com,
Finishing Dry Wall
1. Try to keep the sandpaper off the drywall paper and you won't have the fuzz!
2. Take a soft bristle floor broom to the surfaces after the final sanding and prior to the first coat of paint, which removes the particles from the "fuzzed" paper face. This will allow the paint to lay the damaged paper down and flow across the surface more efficiently.
3. Another way to clean the surface and lay the damaged paper down is to wipe the sanded areas with a damp sponge before painting.
4. Use a quality primer.
5. Prime coat should be rolled or sprayed and back-rolled. This lays down the sanding lines and adds a small amount of stipple for good coverage.
6. Check the directions on the paint can. Most are clearly marked "sand between coats".

Basic Sanders

The basic styles of portable sanders haven’t changed very much over the years. We have some old advertising posters from the Rockwell Manuf...